
Toy photography is more than simply taking pictures of objects on a shelf. A well-made photograph can reveal details that are difficult to notice with the naked eye — and turn a small collectible into a meaningful visual document.
For collectors, photographers, and toy enthusiasts, photography becomes part of the collecting experience itself. Vintage toys may survive for decades, but packaging fades, stickers deteriorate, chrome loses its shine, and plastic changes color.
High-quality photographs create a permanent visual record of how these objects look today. They can preserve the condition of a collectible, document the history of a toy line, and even make a miniature model feel like a full-size machine.
Good toy photography is not simply about expensive equipment. It comes from understanding light, perspective, depth of field, color, and the character of the object being photographed.
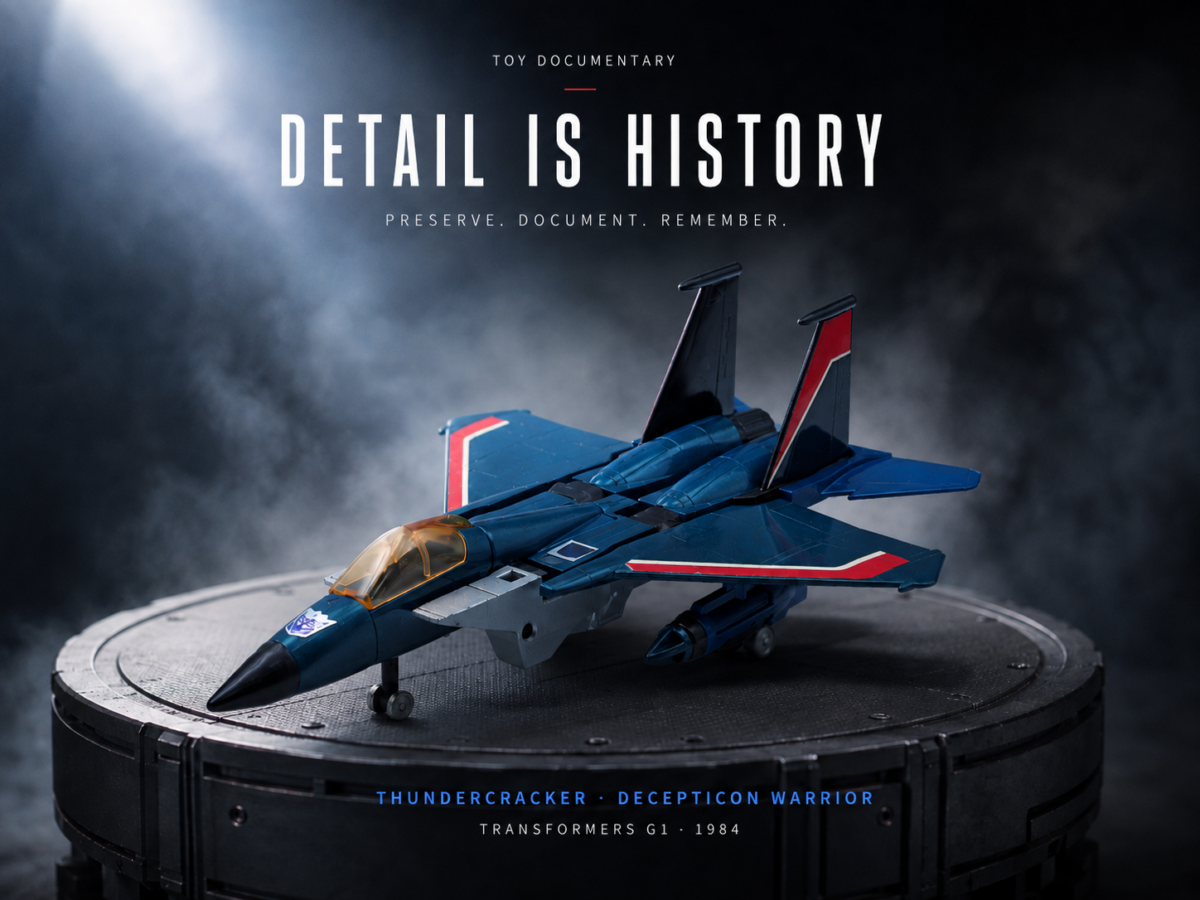
Introduction to Toy Photography
The first decision in toy photography is surprisingly simple: What do you want the photograph to show?
Show the object accurately
Accurate colors, sharp details, natural proportions and a neutral background make the photograph useful as a visual reference.
Create atmosphere
Dramatic shadows, environmental scenery, smoke and low camera angles can transform the same toy into a more immersive visual scene.
For documentary-style photography, accuracy should normally come first. The toy should remain the star of the image. Backgrounds, props, lighting effects and editing should reveal the object rather than compete with it.
This becomes particularly important when photographing vintage collectibles. Factory stickers, paint applications, wheel designs, molding differences, copyright markings, packaging illustrations and even surface textures can help identify the exact version of a toy.
A good toy photograph can perform two jobs at once: it can be visually attractive while also becoming a useful historical reference.
Essential Equipment
You do not need an enormous studio to produce excellent toy photography. A relatively simple setup can deliver professional results.
A good interchangeable-lens camera provides the greatest flexibility, although modern smartphones can also produce impressive images under controlled lighting conditions.
Macro Lens
Ideal for printed details, wheels, decals, faces, mechanical components and packaging artwork.
Tripod
Keeps the camera stable when smaller apertures require slower shutter speeds or multiple focus-stacked images.
Soft Lighting
Diffused LEDs, softboxes or bounced flashes produce smooth highlights and reveal more surface detail.
For serious close-up work, a macro lens is especially valuable. A focal length around 90mm to 105mm provides a useful working distance while maintaining excellent sharpness.
A sturdy tripod is equally important. Toy photography often uses apertures such as f/8 or f/11 to increase depth of field. Because the subject is stationary, slower shutter speeds are rarely a problem once the camera is properly supported.
Lighting Makes the Difference
Lighting probably has a greater influence on toy photography than the camera itself.
Small toys often combine many different materials in a very limited area. A Transformers figure, for example, may include glossy paint, transparent plastic, chrome, rubber tires, matte plastic, stickers and metallic components.
Each material reflects light differently. Direct lighting can create bright hotspots that hide surface detail, particularly on glossy packaging, die-cast cars, transparent windshields and chrome parts.
The solution is often simple: make the apparent light source larger.
Instead of pointing a bare lamp directly at the toy, place diffusion material between the light and the subject. The larger and softer apparent source allows light to wrap around the object more gradually.
For a clean documentary appearance, one large source can act as the main light while a weaker source fills the shadows. A third light can illuminate the background or create subtle separation around the edges of the object.
Do not eliminate every shadow. Completely flat lighting can make a three-dimensional object look lifeless. Gentle shadows communicate volume, depth and surface shape.
Perspective Changes Everything
Camera position dramatically changes how a toy feels.
Photographing slightly above the subject creates a familiar collector's-eye perspective. It works particularly well for catalog photographs and images showing several objects together.
Lower the camera toward the toy's own eye level and the effect changes completely. A small die-cast car can begin to resemble a real automobile, while a model battleship photographed close to deck level can suddenly feel enormous.
Match perspective with intention. Documentary images should communicate the object's real proportions; cinematic images can exaggerate perspective to create drama.
Composition matters as well. Avoid automatically placing every object in the exact center of the frame. Leaving negative space in the direction a vehicle or character is facing often makes an image feel more natural.
Multiple photographs are usually more useful than attempting to show everything in a single frame. A complete record might include front, rear, side and three-quarter views, close-up details, accessories, transformation features and packaging.
Understanding Depth of Field
Depth of field is one of the biggest technical challenges in close-up photography.
The closer the camera moves toward an object, the shallower the area of apparent sharp focus becomes. Even at f/8, the front of a toy may look perfectly sharp while details only a few centimeters farther away become noticeably softer.
Smaller apertures increase depth of field, but there is a limit. Extremely small apertures introduce diffraction and reduce overall image sharpness.
For many macro lenses, approximately f/8 to f/11 offers a useful compromise between depth of field and overall image quality.
When maximum detail is required, focus stacking can solve the problem. Instead of taking a single image, photograph the subject several times while moving the focus point gradually from front to back.
Software combines the sharp areas from each exposure into a single photograph. Because toys, models and packaging do not move, they are particularly suitable subjects for this technique.
Accurate Color Matters
For collectible documentation, color accuracy is especially important.
Automatic white balance may shift slightly from photograph to photograph. A red toy can become too orange, a white background can appear blue, or vintage cream-colored plastic can look much whiter than it really is.
A gray card or color reference target provides a more consistent starting point. Photograph the reference under the same lighting as the toy, then use it to establish neutral white balance during RAW processing.
The objective is not to make an old toy look brand new. It is to make the photograph accurately represent the toy.
Adjust exposure, white balance, contrast, highlights, shadows and lens corrections when necessary, but documentary editing should remain restrained.
Background and Presentation
A background can completely change how a viewer interprets a toy.
Neutral Background
White and light gray backgrounds feel clean, controlled and archival, allowing viewers to study the collectible itself.
Environmental Scene
A miniature vehicle photographed in a scaled environment creates context, atmosphere and imagination.
Both approaches are useful. For a serious toy collection, it is often worth creating both: clean archival photographs and creative presentation photographs.
Post-Processing Without Losing Authenticity
Post-processing should refine the photograph rather than replace it.
Dust removal is especially useful because macro photography reveals particles that may have been almost invisible during shooting. Removing small pieces of lint or sensor spots does not change the character of the collectible.
Brightness and contrast can be adjusted carefully to reproduce how the toy looked under neutral viewing conditions. Sharpening should remain moderate because excessive sharpening creates unnatural edges, particularly around printed graphics and packaging.
Excessive saturation should also be avoided when documenting vintage toys. Colors should represent the object, not an idealized version of it.
The best editing is often editing that viewers never notice.
Photographing Toys as Historical Objects
As toy collections grow older, high-quality photography becomes increasingly valuable.
Many toys produced during the 1970s, 1980s and 1990s were never professionally photographed at extremely high resolution. Original catalogs were limited by the reproduction technology of their time, while online photographs are often compressed, small or taken from incomplete examples.
Collectors today therefore have an opportunity to create something that often did not exist when these toys were new: a detailed digital visual archive.
A carefully photographed collectible can preserve its design, packaging, manufacturing details, artwork and present condition for future collectors.
When photography becomes documentation.
Toy photography begins as a way of recording a collection, but it can become something more valuable. Each carefully produced image preserves a physical object at a particular moment in its history.
When technical accuracy is combined with thoughtful lighting, composition and perspective, a photograph can preserve the historical object while also reminding us exactly why the toy was fascinating in the first place.